Aggressive Profile for Anti-Spam
Efficacy Guide using Cisco Secure Email
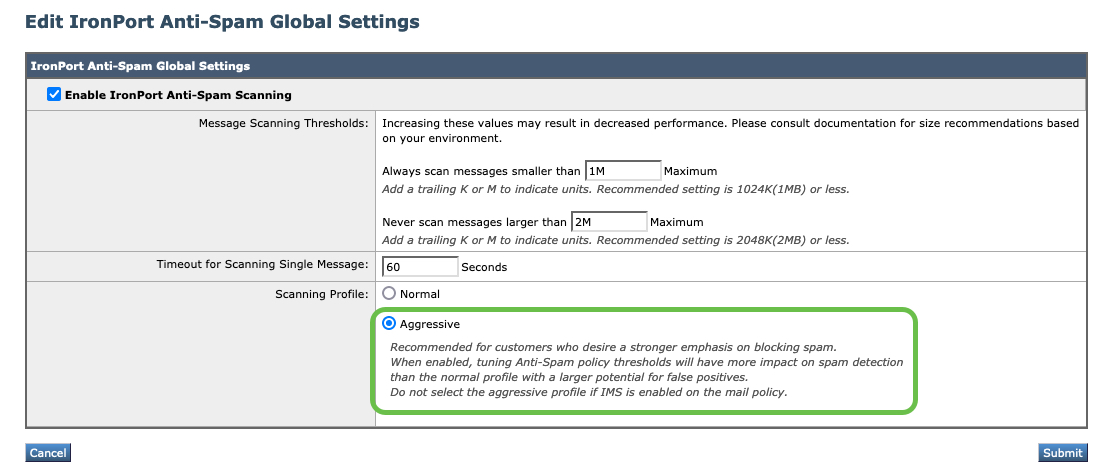
Enable the Aggressive Scanning Profile for Anti-Spam
From the UI of your Gateway/Cloud Gateway, do the following:
- Security Services > IronPort Anti-Spam
- Click Edit Global Settings...
- For Scanning Profile, change from Normal to Aggressive
- Submit and Commit your configuration changes

What is the 'Aggressive' Scanning Profile?
The Aggressive profile allows customers who desire a stronger emphasis on blocking spam.
The Aggressive profile emphasizes machine learning-based systems that respond well to submissions.
When using the Aggressive Scanning Profile:
- Using the Aggressive profile is a global-level setting, so ALL per-policy Anti-Spam configuration(s) will have this profile applied.
- When enabled, tuning Anti-Spam policy thresholds will have more impact on spam detection than the Normal profile, with a more significant potential for false positives. Therefore, please reset ALL policy-level Anti-Spam spam thresholds to "Use the Default Thresholds." Do NOT use custom settings for positively identified spam or suspect spam.
- In addition to having Anti-Spam with the Aggressive profile configured, Cisco recommends enabling Graymail for the same policy/policies. Graymail verdicts are exposed to IPAS, which have provided detection with the Aggressive profile enabled.
- Finally, if you are using Intelligent Multi-Scan, do NOT select the Aggressive profile.
Guide Checklist
At this time, we have completed the following:
- Introduction
- Validate Detection Services
- Review of Bypass, Accept or Allow Lists
- Aggressive Profile for Anti-Spam
- Review and Validate MX Records
- Submissions to Talos
- Support Requests
- Security Review (Optional)
Once you have configured the Aggressive profile, please proceed to the next section of this document.
Updated about 2 years ago
What’s Next
