CLI Instructions: PuTTY [Windows/PC Users]
For Cisco Cloud Email Security (CES) customers...
Instructions for using PuTTY and utilizing SSH to make command line interface (CLI) access via CES proxy
Pre-requisites
As a CES customer, you should have engaged CES On-Boarding/Ops, or Cisco TAC to have SSH Keys exchanged and placed.
- Generate Private/Public RSA key(s)
- Provide Cisco with your Public RSA key
- Wait for Cisco to save and notify you that your key(s) have been saved to your CES customer account
- Setup PuTTY as detailed here in these instructions
How do I create Private/Public RSA keys(s)?
Cisco recommends using PuTTYgen (https://www.puttygen.com/) for Windows.
For more information: https://www.ssh.com/ssh/putty/windows/puttygen
Note
- Please make sure that you safeguard access to your RSA private keys at all times.
- Please do not send your private key to Cisco, only the public key (.pub).
- When submitting your public key to Cisco, please identify the email address/first name/last name that they key is for.
How do I open a Cisco Support Request to provide my public key?
https://mycase.cloudapps.cisco.com/case
Please be sure that you properly identify the SR as "Cisco CES Customer SSH/CLI Setup", etc.
How can I configure my ESA or SMA to log in without prompting for a password?
How to configure SSH Public Key Authentication for login to the ESA without a password
Accessing your CES ESA or SMA CLI can be made through a Cisco-provided SSH proxy.
- You will initiate a local port forwarding proxy on your workstation.
- Your workstation will be listening to a local host port.
- You will then SSH to your local host, which will forward the SSH traffic to your IronPort appliance.
PuTTy Configuration
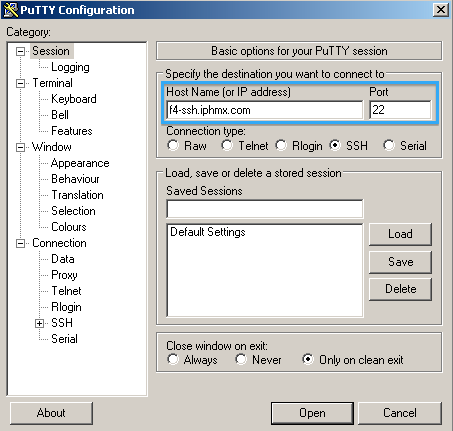
To get started, open PuTTY and use one of the following proxy hosts for the Host Name:
Note
Make sure you choose the correct proxy for your region! (I.e., If you are a US CES customer, to reach F4 data center and appliances, use the f4-ssh.iphmx.com. If you are an EU CES customer with an appliance in German DC, use f17-ssh.eu.iphmx.com...)
AP (ap.iphmx.com)
f15-ssh.ap.iphmx.com
f16-ssh.ap.iphmx.com
CA (ca.iphmx.com)
f13-ssh.ca.iphmx.com
f14-ssh.ca.iphmx.com
EU (c3s2.iphmx.com)
f10-ssh.c3s2.iphmx.com
f11-ssh.c3s2.iphmx.com
EU (eu.iphmx.com)(German DC)
f17-ssh.eu.iphmx.com
f18-ssh.eu.iphmx.com
US (iphmx.com)
f4-ssh.iphmx.com
f5-ssh.iphmx.com
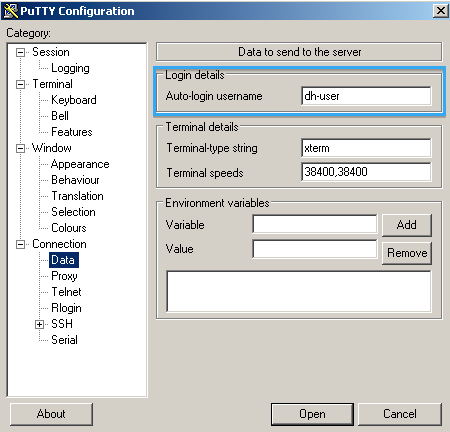
Click Data and for Login details: Auto-login username enter dh-user:
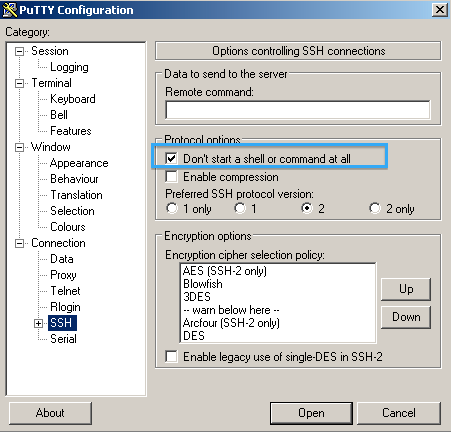
Select SSH and check Don't start a shell or command at all:
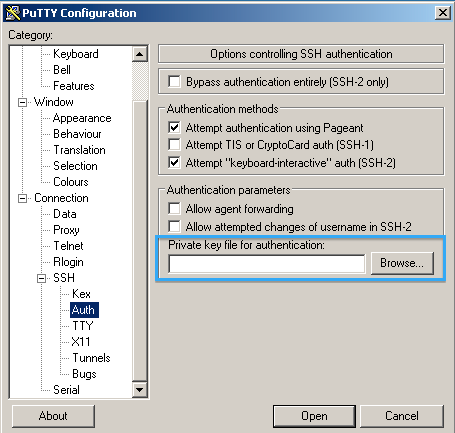
Click Auth and for Private key file for authentication, browse and choose your private key:
Click Tunnels
Enter in a Source port; this is any arbitrary port of your choice. (Example uses 2200.)
Enter in a Destination; this is your ESA or SMA + 22 (specifying SSH connection):
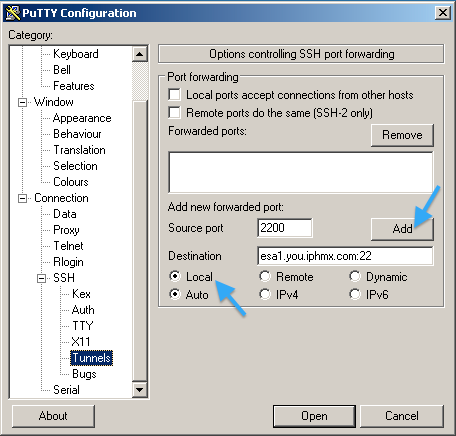
After you click Add it should look like this:
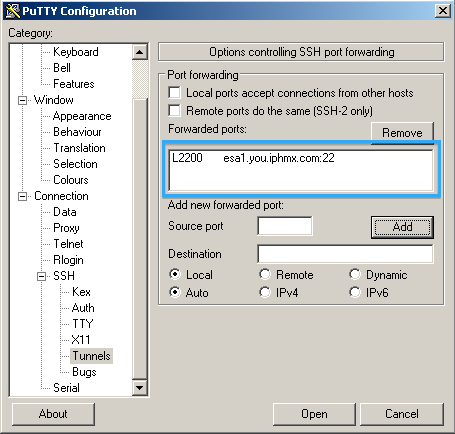
To save the session for future use, click Session
Enter a name for your "Saved Session", and click Save:
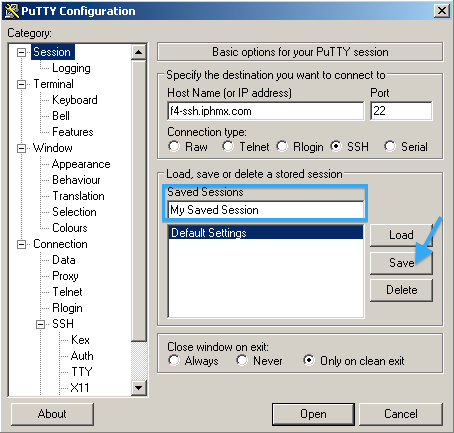
At this time you can click Open and initiate the proxy session.
There will not be any login or command prompt. You will now need to open a second PuTTY session to your ESA or SMA.
Use the hostname 127.0.0.1 and use the source port number in the tunnel configuration above.
For our example, we are using 2200.
Click Open to connect to your appliance.
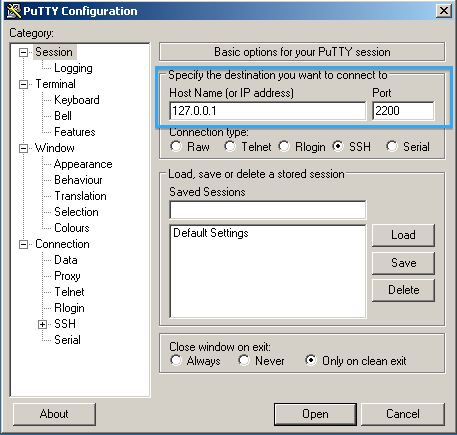
When prompted use your appliance username and password, the same as you would with UI access.
Troubleshooting
If your SSH key pair was generated using OpenSSH (non-PuTTy), you may not be able to connect and will be presented with an "old PEM format" error:
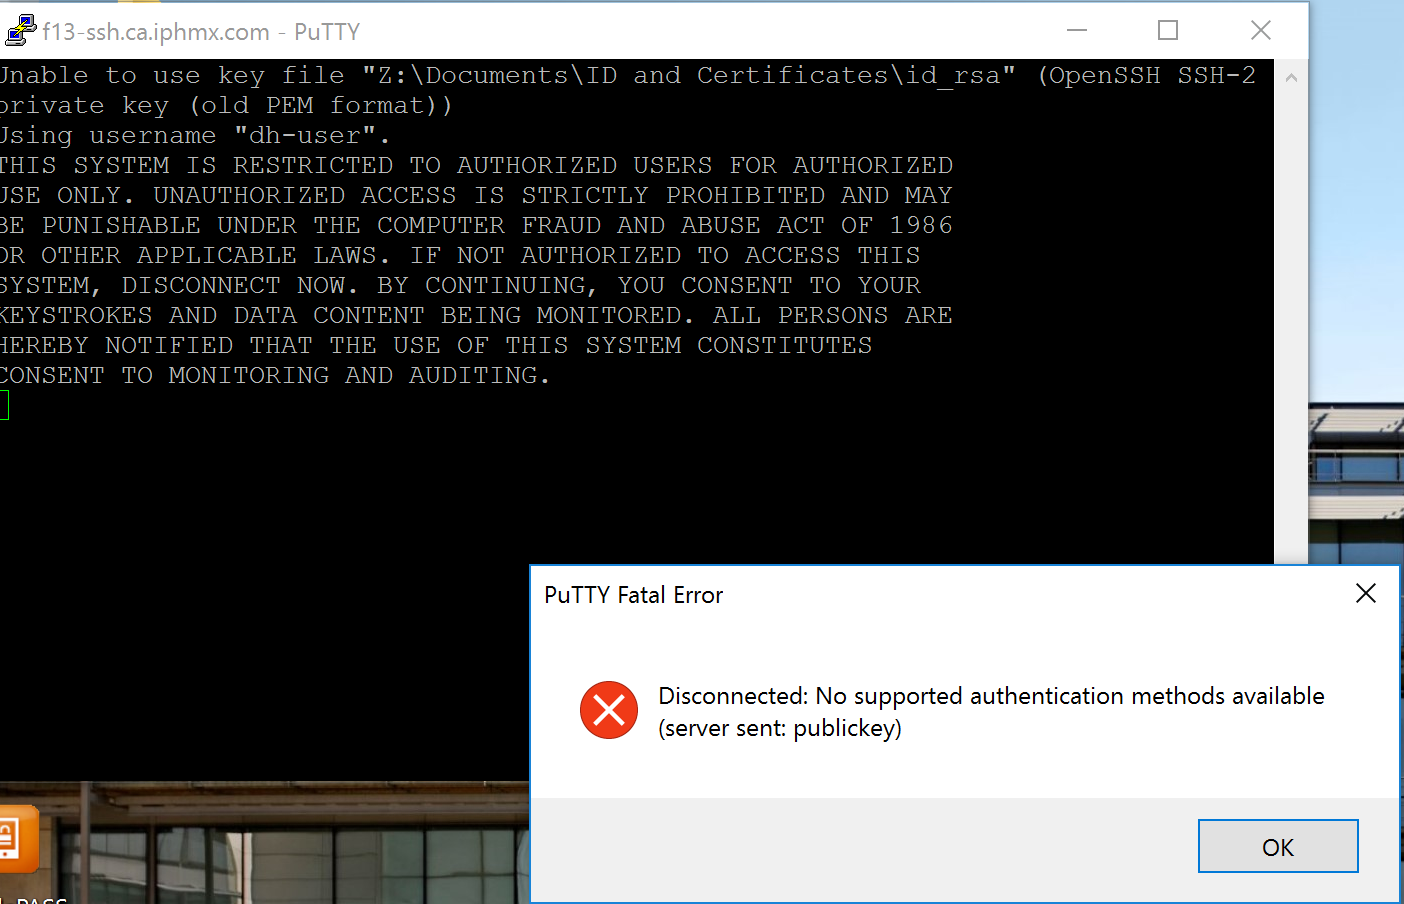
The private key can be converted using PuTTY Key Generator
- Open PuTTy Key Generator
- Click Load to browse and load your existing private key
- You will need to click the drop-down and select All Files (.) so you may locate the private key
- Click Open once you have located your private key
- Puttygen will provide a notice like in the image below:
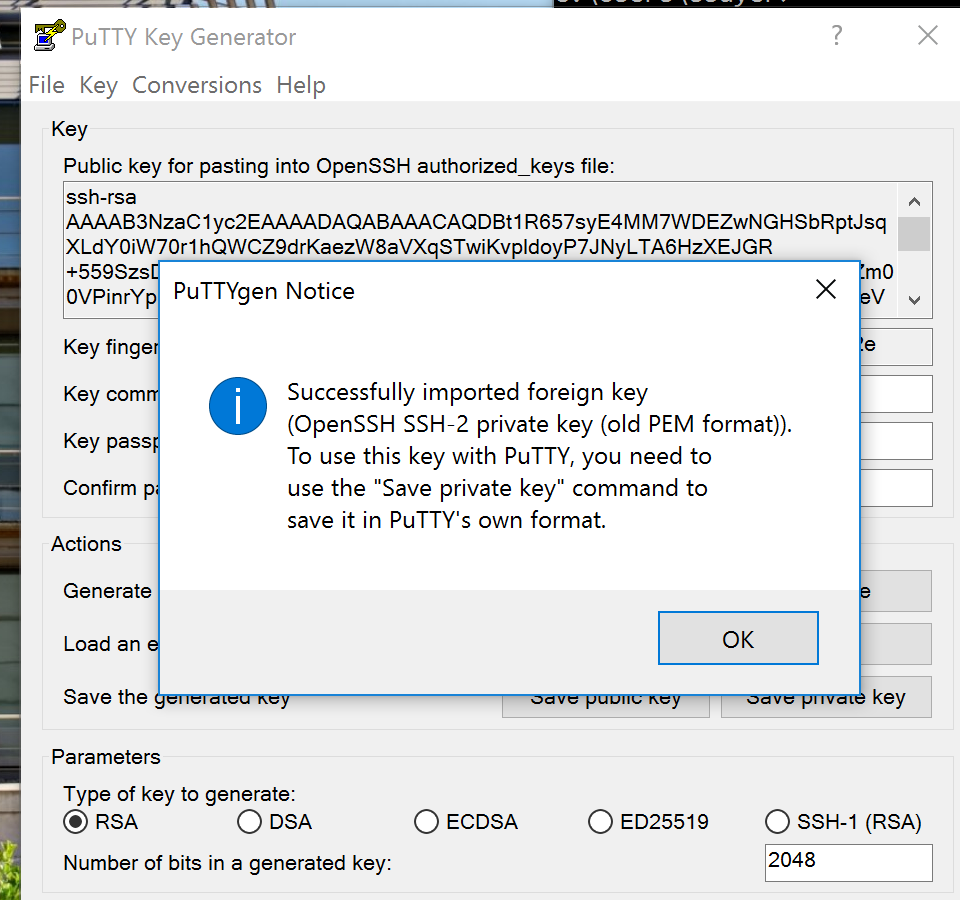
- Click Save private key
- From your PuTTY session, use this converted private key and save the session
- Attempt re-connecting with the converted private key
Please confirm that you are able to access your appliances via the command line.
Updated about 2 years ago
