AMI Image Deployment
AMI Deployment Walk-thru
You have been told that your AMI provisioning is completed. Now what?
- From AWS > EC2, click on your Instances
❗ Make sure that you are in the AWS Region you requested provisioning.
- Upper right (in orange) click Launch Instances
From the Launch an instance screen:
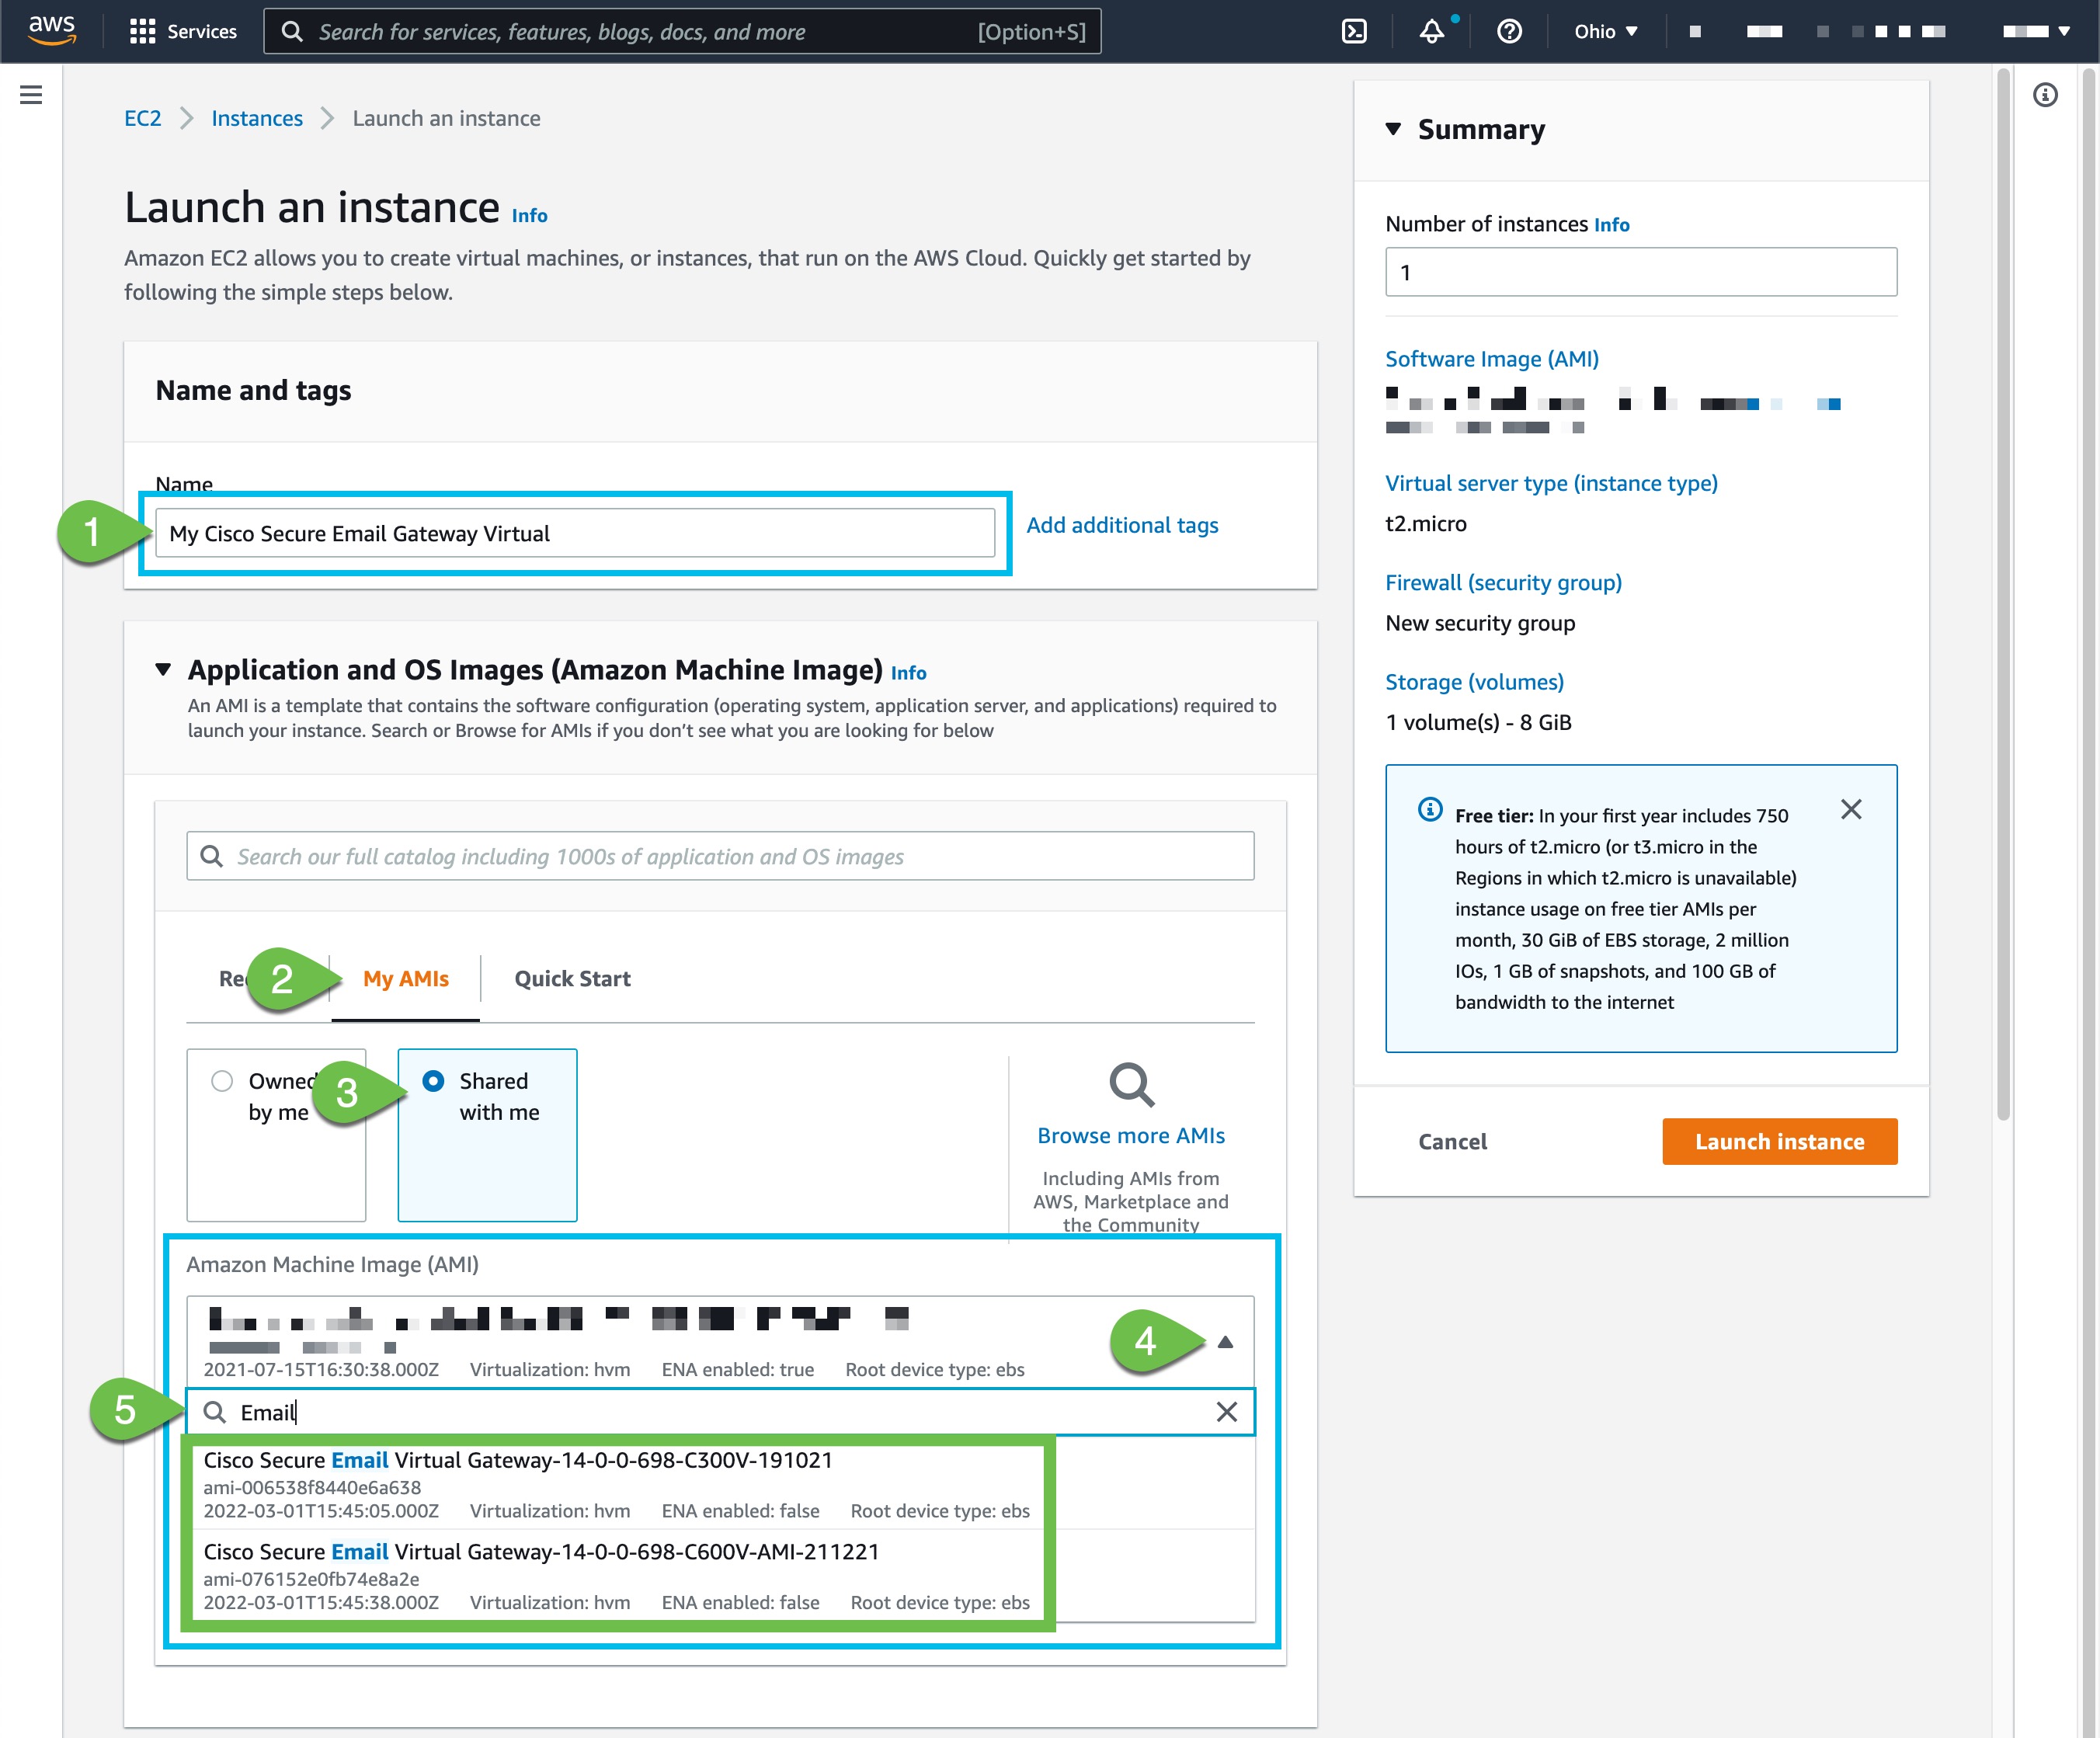
- Create a 'Name' for your Cisco Secure Email Gateway Virtual
- In the Application and OS Images (Amazon Machine Image) section, click My AMIs
- Select the Shared with me option
- In the Amazon Machine Image (AMI) area, use the drop-down arrow to expand the listings
- At the top of the listings return you will see the search box/option, enter "Email" or "Phoebe"
The provisioned AMI will show in the returned listing, similar to the following:

From there, continue on with the Install Guide:
Updated about 2 years ago
